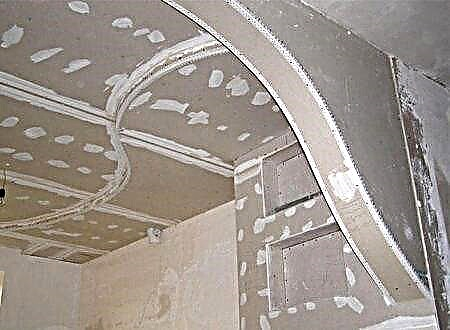
Arched drywall is now becoming a popular building material. It is such a drywall that allows you to implement the most daring design ideas as efficiently as possible. With its help create arched, semicircular and round elements, assemble the most complicated constructions of curved shape.
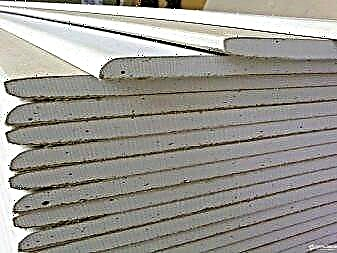
The material has sufficient flexibility, so that the craftsmen produce curved parts that are durable, reliable. Simplicity of processing is also guaranteed by the small thickness of the sheets - only 6 mm. The thickness of the standard drywall plate is 12.5 mm.
Features
Arch-type drywall has a standard structure. Each sheet has a gypsum core, which is surrounded on two sides by cardboard plates. At the same time, the composition of the arch sheets is special: in the production of the material, more high-tech cardboard is used, which is also additionally reinforced with fiberglass.
Thanks to the reinforcement, the material has a minimum weight and thickness. Strength is greatly increased. A sheet thickness of 6 - 6.5 mm guarantees ease of installation, bending.
Fields of application
Arched drywall - a modern building material. It is widely used in various finishing works. The following robust designs can be made from arched sheets:
- multi-level ceilings of complex curved shapes,
- doorways made in interior partitions that have a rounded shape,
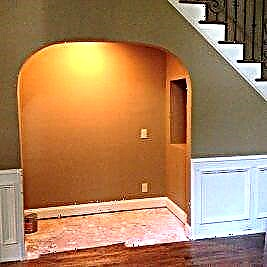
- special arched niches in the walls,
- protective structures for spiral staircases,
- partitions with small radii of curvature.
The material is ergonomic, reliable and completely safe from an environmental point of view.

Tip. Try to entrust the work with arched drywall to professionals. Despite the relative ease of installation, it should be performed by experienced craftsmen. They know exactly all the nuances of the technology of bending and subsequent installation of structures of their arched sheets.
Installation specifics
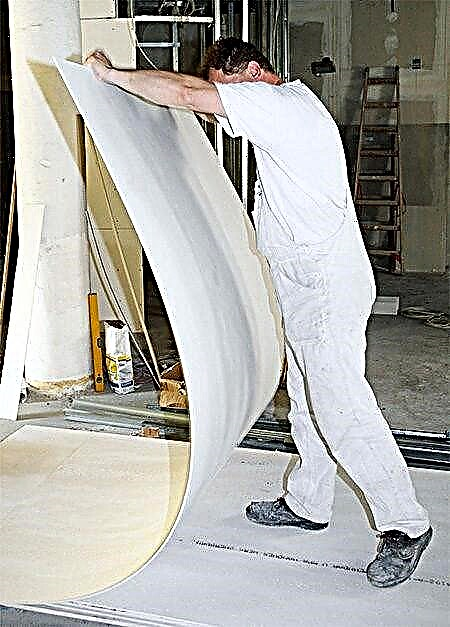
It is important to remember that drywall, even arched, can not be bent arbitrarily, without additional processing. Here is the following task: before bending and after installation, the material must have sufficient rigidity to reliably maintain a given shape. That is why in order to give sufficient flexibility it must be processed in a special way.
The so-called wet bending allows achieving the greatest results. When this technique is applied, an excellent bend radius of 30 cm can be achieved. And even this is not the limit. Before work, it is desirable to make the appropriate template, which should correspond to the details of the drywall in shape. The sheets are moistened with water, then laid according to the template and fixed, pressed with weights.

Technology for professionals. You should not take up work without experience. Only the master knows exactly how to properly wet the material. If there is not enough water, the leaf will not bend well. When the material is too wet, the cardboard may suddenly start to soak, lose its basic technical properties.

Specialists cope with the method of wet bending flawlessly. The craziest design ideas can easily be realized when there is a quality arched drywall at hand, and the master is fluent in bending and mounting technology. Especially fantastic look the most complicated constructions of curved bizarre lines in multi-level ceilings.

You can bend dry sheets, but you can’t achieve good results: the minimum radius will be 100 cm.

Benefits
Consider the most significant advantages of arched building material.
- Bending over large radii without pre-soaking. If it is not planned to bend the material strongly, the sheets can be given a curved shape even without preliminary treatment with water. In this case, the plate will need to be slightly kneaded. There is one important point: the bending radius must be placed along the sheet along its length. This is due to the location of the reinforcement threads.
- Resistance to high humidity. Standard drywall is not suitable for use in rooms where the humidity level is significantly increased. But moisture is not terrible for arched material. Sheets are resistant to moisture. In the core of the arched drywall there are special additives that successfully prevent the formation of fungus.
- Efficiency of bending and installation. Using arched drywall, finishing work is much faster. At the same time, the installation speed does not affect quality in any way: complex structures will be reliable, durable.
- Also, arched drywall practically does not need finishing. You can simply apply a thin putty coat.
Choose modern material to embody original design ideas.
Types of drywall arches in the apartment you can see the following article.
Features and Benefits
Arched drywall has the appearance of a sandwich. It consists of two cardboard surfaces and a mineral inner layer impregnated with fiberglass. It is based on gypsum, the amount of which is more than 90%. In addition, the components are cardboard (6%) and auxiliary components (1%).
Among the advantages of GCR are the following:
- increased flexibility
- high strength
- small thickness
- high thermal insulation and sound insulation,
- high degree of fire resistance
- lack of extraneous odors,
- ability to regulate humidity indoors.

Disadvantages
The disadvantages of arched drywall include:
- inconvenience during work,
- cutting difficulty
- the complexity of screwing fasteners,
- price segment.
Excessive thinness of the sheet increases the amount of material used., and this is financially expensive. The thickness of the often encountered arched drywall is 6 mm and 6.6 mm, the length and width depend on the manufacturer, the most common sizes are 1.2 x 2.5 m, 1.2 x 3 m.


GKL opening device
To properly make an interior doorway from drywall with your own hands, you need to first prepare the necessary tools and follow strict rules when doing this.
Initially, it is necessary to prepare:
- arched drywall,
- metal cutting scissors
- serpentine tape
- sand paper
- Roulette
- hammer drill
- screwdriver
- construction level,
- mounting foam
- plumb for installation of guide profiles,
- cutter,
- pencil.

Drywall opening device can be divided into two stages:
- frame manufacturing
- installation of a doorway.
To carry out the work correctly, you can take note of the step-by-step instructions for mounting the frame:
- We fix the doorway stand to the ceiling and floor (to the profiles).
- We install intermediate racks (the distance from each other is 0.5 m).
- On the horizontal bar above the door we fix an arcuate segment made of drywall.
- The connection is carried out using screws.
- If you need additional rigidity, you can insert a wooden beam into the doorway.


After completion, we proceed to the second stage. This is drywall laying, which is carried out in compliance with the basic rules:
- The distance from the self-tapping screw to the edge of the drywall sheet should be 1 cm.
- The distance between the fasteners should not exceed 15 cm.
- GCRs located nearby should be on the same profile.
- The fastening cap is inserted into the sheet to a depth of not more than 0.8 mm.
- A suitable size for self-tapping screws is 2 cm.
Then do all the work on sealing joints and cosmetic procedures. So the fixed sheets of drywall on the prepared frame look beautiful and aesthetically pleasing, forming an opening.
Application Tips
In order not to spoil the repair, exclude additional expenses for finishing and building materials, you need to take into account some nuances:
- Drywall does not like moisture; from its excess, it can fall apart.
- Complete drying of the finishing material takes at least 12 hours.
- To prevent rust spots on the surface over time, it is better to use galvanized screws or stainless steel fasteners for fastening.
- To prevent gypsum from spilling out, it is necessary to screw the screws to a clearly specified depth.

It is necessary to choose and apply finishing material strictly for its intended purpose. For example, for a multilevel ceiling and curved structures, arched material is used, which can be given any shape, and for walls a denser wall material is suitable with a number of additional advantages. Sheets must be used within a few days after purchase.
The methods that you can use to bend drywall, see the video below.
DIY arch erection
The device of an aperture from GKL is not difficult for a person a little familiar with the basics of construction.
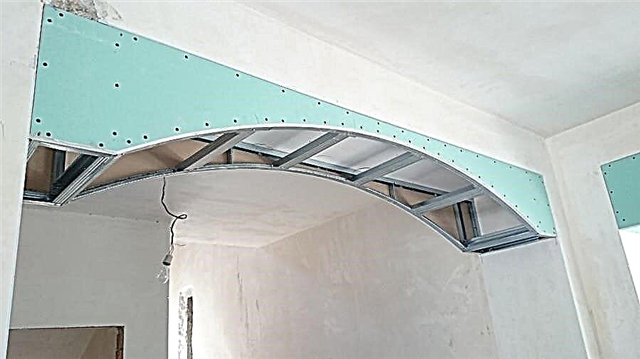
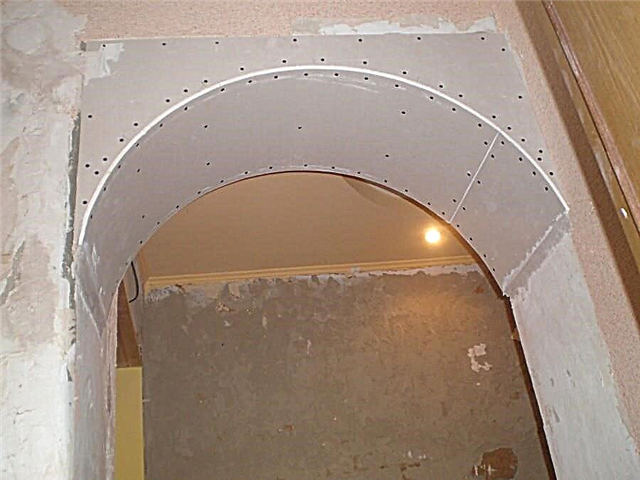
- Initially mounted arch frame from a metal profile, for this, depending on the radius, 7–10 cm lateral faces are cut on the profile, the profile bends and hardens in the opening. For structural strength, vertical stiffeners are installed in several places.
- Measure the right size and cut off the arch strip from the long side of the drywall sheet. This is important, since fiberglass fibers are positioned in a certain way, and the material bends only in the longitudinal direction.
- It is necessary to determine the radius of the arch. If it is more than 100 cm, then the dry folding method is used and is attached to the frame from the middle to the edges with a pitch between screws of no more than 15-17 cm.
- For a steep arch, the method of “wet” folding of the sheet is used. Make a template of hard cardboard. A strip of GCR is cut to the desired size and rolled with a needle roller. Wet on the one hand, trying to do it evenly, avoiding wetting of the reverse side. The moistened sheet is mounted on the template and bent smoothly, being careful not to break the dry side of the GCR. The bending is carried out from the center to the edges, having reached the desired radius, the strip is fixed with improvised material, bars or in another way. After complete drying, screw onto the frame.
Knauf Flexible Arch Plasterboard 6 mm Thick
Our life is changing day by day, new technologies are being introduced to the market. The materials are being improved, and what until recently seemed like science fiction turns into the most mundane things. Such a novelty is the arched gypsum board with a thickness of 6.5 mm. Thanks to this invention, the implementation of interesting ideas involving the use of complex curvilinear shapes has been simplified, and the designer fantasy has the opportunity to spread its wings even more.
What is flexible drywall?
In fact, this is a traditional gypsum plasterboard, consisting of a gypsum core, which was reinforced on both sides with fiberglass recessed into it. This finishing material is used in construction and decoration. GKL differs from usual GKL by almost twice reduced thickness. The remaining overall parameters largely correspond to the standard ones, for example, the sheet size of the arched gypsum plasterboard from “Knauf - 1200 × 2400 mm.
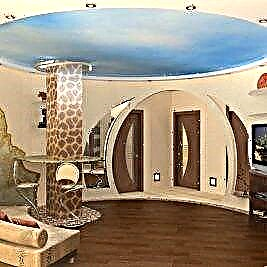
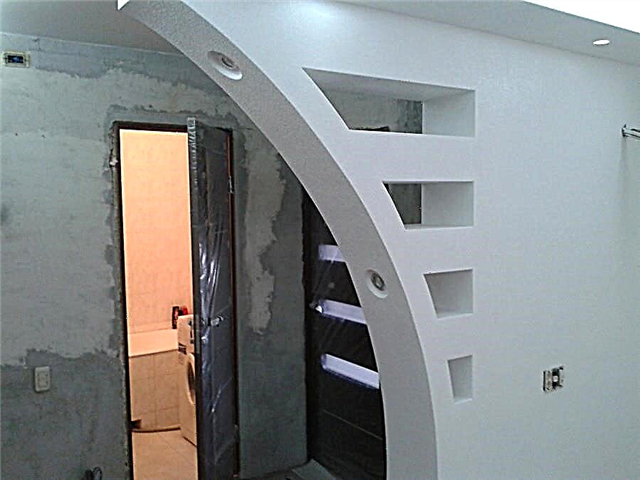
Due to its reduced thickness and special additives, arched gypsum plasterboard has gained high elasticity. It is his ability to bend well in both directions that is widely appreciated by interior designers, since it helps to create the most bizarre figures. Using arched drywall are made:
- rounded niches
- columns
- domed, strongly curved structures,
- arches
- rounded corners
- wave lines on ceilings and walls,
- Fancy shaped arches.
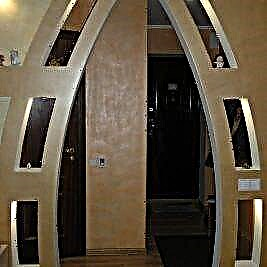
Flexible drywall found application in the creation of high-tech and modern designs. The photo below shows the arch portal made of arched gypsum plasterboard.
Unfortunately, reducing the thickness by six millimeters did not have the best effect on the strength of the finished structure. Therefore, in some cases, the sheets are mounted in two layers, for example, if it is not about the arch, but about a figured shelf that can deform under the weight of things installed on it.
Nothing is perfect: material flaws
This statement also applies to flexible drywall sheets.
- The addition of fiberglass and other special additives to the core for reinforcing along the way increases the density of drywall. Therefore, it is more difficult to cut such sheets, fix them with screws, and process them with a planer.
- In structures requiring additional rigidity, as mentioned above, arched gypsum plasterboard is laid in two layers, which is associated with additional labor costs.
- The price of the described material is 330-370 rubles. per sheet - exceeds the cost of standard wall and ceiling plates, and if two-layer installation is planned, the difference will grow even more.
Arched Sheet Technology
Knauf offers the following bending methods for its Knauf sheets:
- Dry, the minimum bending radius when using which is 100 cm.
- Wet, with a permissible bending radius of 30 cm or more.
Procedure for dry bending:
- The frame of the structure is being prepared.
- The sheet bends along the frame, fastens with screws from the middle to the edges. The pitch between the screws is 15-17 cm.
- The compressible side of the sheet is rolled with a needle roller, placed on gaskets to prevent moisture from entering the back side. If the other side gets wet, cardboard may tear during bending.
- The workpiece is wetted with water with a brush or sponge until the liquid is no longer absorbed.
- The sheet is installed on the template, its center should coincide with the axis of the template. The edges are pressed by the bars, the workpiece is left in this position until it dries completely.
Summing up, it is worth noting that the advantages of the arched version of drywall exceed all its possible disadvantages. Flexible GCR are widely used in modern construction for the construction of complex structures. Features of working with arch sheets - in the video below.
Arched drywall: application features

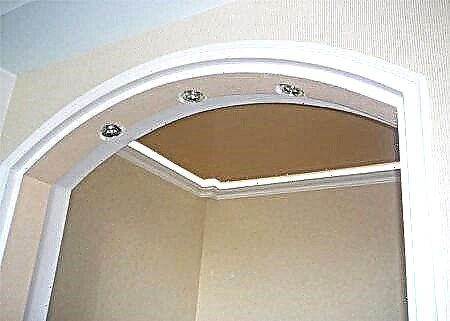
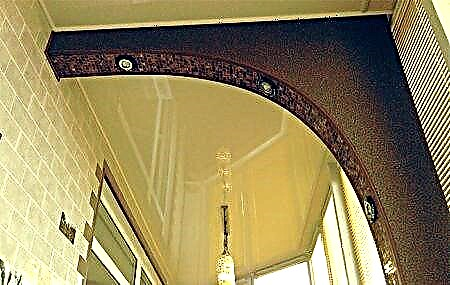
Arched drywall - a type of finishing material used in the design of the room. With its help create various arches, semi-arches, multi-level ceiling structures, many curved, curved structures, including oval and rounded walls, partitions and niches. To understand what are the features of using arched gypsum plasterboard, how to make an aperture from gypsum plasterboard, is it possible to do it yourself, we study the characteristics of the material.
Drywall Arch Design
A certain type of arch is selected for a specific room and interior, with a certain arch shape, each here at his discretion and taste decides which one is needed. The following plasterboard arches are considered more common: After drying, walk along the surface with an emery cloth, do not overdo it. We cover everything with a second layer of putty.
Fine sandpaper to walk on the surface after drying. With a rectangular spatula, the final putty is applied. After 11 hours, you can grind with sandpaper.
- Roulette,
- Pencil,
- Rope,
- Level,
- Jigsaw
- Two types of GCR with different thicknesses, wall thickness of 12 mm. And 6.5 mm arched,
- Guides П - profiles of two types,
- Plastic dowels,
- Screwdriver
- Self-tapping screws of different sizes,
- Hammer drill
- Knife for working with metal,
- Putty knife,
- Brushes
- Needle roller
- Putty, primer,
- Gloves
- Protective glasses,
- Respiratory mask.
In the wooden version of the plasterboard arch, working with a wooden arch in itself is not of significant complexity. Prepared materials that must be present: To make the arch with your own hands, putty is mixed, then it is applied initially to all seams and joints, self-tapping hats, until the surface acquires even shapes.
DIY plasterboard arch: step-by-step instructions
Usually they are guided by the simple ratio of a standard interior door - 80-100 cm wide by 200 cm high. That is, in the plane of the opening, taking into account the arch, a rectangle of such dimensions should be inscribed in the “pure form”. Following this rule, it is possible to determine that the width of the opening: To bend the strip of the workpiece with an arc, it is moistened with a sponge on both sides before installation. Then, on one side, they roll with a needle roller (another method is to prick 1/3 of the sheet thickness with an awl over the entire surface) and once again moisten only on the perforated side.
They put on the floor at an angle to him and the wall. When the workpiece begins to bend under its own weight, it is screwed into place with arched profiles. To obtain a sector in radius, it is better to use an awl, a nail and a pencil tied with a thread or a rope. The length of the thread from the pencil to the nail will determine the radius of the sector. After the approximate values for the points of interfacing with the opening and for the height of the arch are set, the arch in the opening can be modeled from improvised means and make sure that it corresponds to the general plan.
If the wall has a layer of decorative plaster or is lined with wall panels, then the fastening of the frame should pass to the main material of the wall so that the walls of the arch are in the same plane with the surface of the partition itself, and not its decorative finish. This rule is executed on each side of the arch.
Installation of the arch frame under drywall
To make the frame for the arch of drywall, in the manufacture of curved structures, an arched profile and drywall are produced. The sheet is reinforced with fiberglass, unlike the wall gypsum board, it easily bends, does not break. Transverse cuts are made on the cut-to-size workpiece with a construction knife, cutting through the paper and slightly gypsum. Apply it to the side surface, breaking along the incisions.
The pitch of the notches depends on the bending angle, on average, from 4 to 8 cm.
Dry arch bending method for gypsum plasterboard Self-tapping screws for fixing the profile and drywall are selected depending on the load, profile thickness, size of structures. The heavier and larger the arched opening, the stronger the fasteners should be. For screwing to a bar, wood screws are used.
An example of the design of the arch frame Tools:
- appointment: directing (CD, CW) and rack-mount (UD, UW),
- manufacturing material: plastic, metal,
- bending radius: from 500 mm to 5000 mm,
- length: 2.6 m, 3.1 m, 4 m,
- thickness: on average from 60 mm to 65 mm.
- The blanks are inserted into the guides, sequentially, on each side.
- Screwed around the perimeter to the posts with screws LB, LN 16 mm.
- The butt of the bent surface of the arch is reinforced with jumpers. For this, pieces of the guide profile are cut along the width of the arched opening, the end is cut with scissors at an angle.
- Screw them to the side surface (screws LB, LN 9 mm).
Despite the positive characteristics, gypsum board has one drawback - it is fragility. Therefore, it is not recommended to install it on walls that are subjected to mechanical stress. The main feature of drywall is that when wet it easily changes shape. Due to this quality, it can be used not only for the implementation of any ideas in the interior, but also for leveling surfaces.
We cut out a blank of a given width, a selected radius using a template or another method from a drywall sheet. According to the marking, we cut out with a paint knife, a jigsaw, the necessary drywall part in duplicate. Arched structures made of drywall is another type of interior decoration using drywall sheets.
Drywall is a multifunctional material that is perfectly cut, bent, easy to install, has a wide range of design decisions.
Do-it-yourself plasterboard arch
This stage is very important for creating your arch, so be careful and make sure that the drywall is well fixed on the metal frame. To get a flat surface, the screws must be screwed in every 10-15 cm.
- tape measure, joiner's square, pencil,
- screwdriver
- scissors for metal,
- knife,
- putty knife,
- grout,
- bucket,
- protective gloves, goggles and a respirator.
To get started, select a place to create the arch. We will tell you how to make an arch of drywall in the doorway, but you can build it almost anywhere in your house - everything is limited only by your imagination. Measure the size of your chosen area. Measure and cut a piece of mesh of the desired length. Then place the net or paper in the center of the joint and gently push it with your fingers or putty knife into the fresh putty.
Carefully ensure that the mesh is well tensioned during installation; otherwise, wrinkles will appear. Do not apply too much putty at once. Spread the amount already applied over a large area by moving the grout several times. Return excess material back to the bucket. “The wet method requires accuracy and time. Plasterboard sheets should be bent if the bending radius is large.
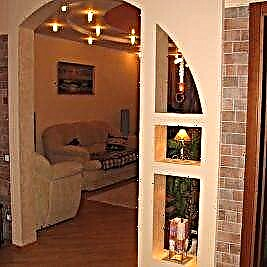
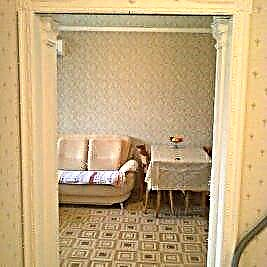
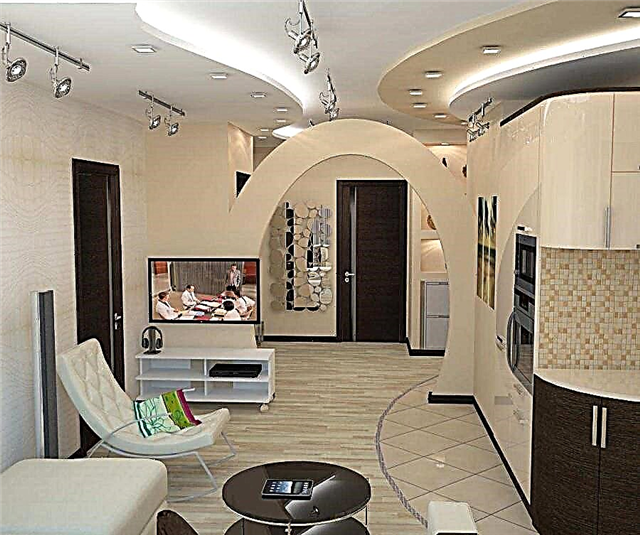
Drywall is applied to the metal frame and from the center to the edge carefully, step by step, there is a bend of the sheet with its fixing with screws. The arch in the interior performs several functions. First, she zones the room. It can be a separation between the kitchen and the hall, exit to the balcony.
Secondly, they make the apartment bigger and lighter visually. Thirdly, when creating a design instead of a doorway, there is no need to choose doors that can make a room small and dark. The creation of lighting in arched openings will be additional lighting at night, as well as an addition to the overall design of the apartment.
After the manufacture of the frame, you can proceed to its plasterboard sheathing. In order to make the usual shelves, niches and other similar designs, drywall sheets are used, the same as for wall decoration. Firstly, it is necessary to choose a suitable version of the future design of drywall.
For example, to perform a drywall arch, you need to know the dimensions of the length of the arc, the arch opening, and the bending radius.
Installation of drywall constructions: 4 basic scenarios
GKL slopes are attached to the main wall with plaster glue. The same fastening method can be used to align walls without a frame. It is applicable if the maximum difference between the wall sections does not exceed 5 centimeters.
Stitches between the factory edges of the sheets do not need alignment: the edges of the most common type - PLUK - are made rounded. Traditionally, gypsum putty is used to putty joints and fasteners. It differs from building gypsum in a longer setting time - 30 - 45 minutes versus 3 - 5.To ensure that the profile adjoins the box tightly, first apply strips of mounting foam or sealant to its outer edges.
Drywall screws differ from wood fasteners in a smaller thread pitch, allowing you to more accurately position the cap relative to the surface of the sheet. The hat when screwing in is immersed about a millimeter below the surface and then hides under the putty. When there are two pieces of drywall for the outer parts of the arch, and they are already cut along the contour, you can proceed to create the frame. All the necessary sizes are already there. It is created according to the same principle that was described in the step-by-step instructions, but now we can use the arched profile for drywall.
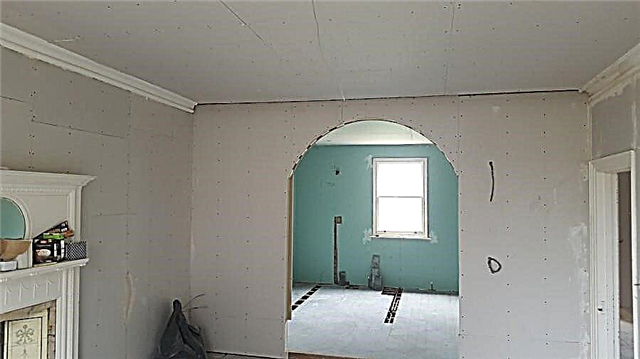
It does not need to be cut, because it bends as you like. A drywall arch is an architectural element that allows you to create an arcuate ceiling in a wall, doorway or partition. Most often, arches are door, because they are easiest to do.
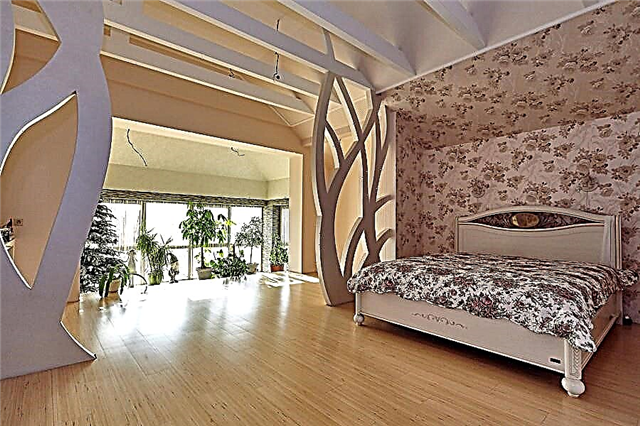
However, if partitions are created, then they often use curvilinear overlappings for a decorative effect.
Necessary tools and material
Of the tools you will need a screwdriver, tape measure, building angle, pencil, spatula, grater, container, knife, sponge, drill, jigsaw, metal scissors.


As for the material, you will need:
- drywall sheets,
- self-tapping screws
- metal (aluminum) profile (or wooden beam),
- putty,
- fiberglass mesh (can be replaced with paper tape).

Procedure for the design of the arched opening
Having decided to make an arch yourself, you must strictly adhere to the step-by-step instructions for the manufacture of drywall arches:

Measure the doorway. An arch will reduce its size, so to see how well it will look, it is advisable to make a preliminary paper or cardboard blank and attach it over the door leaf. If the opening has a height of less than 250 cm, then reducing the bending of the arc will be required.

Draw the outline of the arch on drywall. To draw the top of the arch structure, use a home-made compass from a self-tapping screw screwed into drywall and a thread with a pencil attached to it

The greater the length of the thread, the greater the radius of the arc. Here you have the opportunity to experiment until you get the shape of the arch you need.


Cut the arch with a jigsaw. If you do not have one, then you can use a hacksaw on drywall. Before you start cutting, securely fasten the sheet, otherwise there is a high risk of injury or damage to the GCR.

The tool blade must cut through the material strictly according to the marking - the quality of the arch directly depends on this. Next, start creating an arch frame. It can be metal or wood. Both options have their advantages: the aluminum profile is characterized by evenness and lightness, and the wood is distinguished by great strength.
Experts recommend the use of metal guides, if the walls are made of bricks and wooden timber - if made of wood.


Cut two pieces of the profile with the width of the opening and attach them on top, and install on a pair of profiles on both sides. The length of the side rails depends on the radius of the arch.

If you have a concrete wall, then first you need to make holes with a drill, insert dowels into them and only then screw the screws.

Then, after attaching all the profiles to the wall, begin the installation of gypsum plaster. Installation of sheets is carried out using a screwdriver. The size of the screws depends on the thickness of the drywall.

Fix the curved aluminum profile along the edge of the gypsum wall. This will increase the rigidity of the structure. First, attach both ends of the curved rail to the metal frame, and then fasten the drywall sheets to it. Screw the screws in increments of 0.1-0.15 m.


Mount perpendicular pieces of the profile to connect the side walls of the arch structure to each other.
Lock the lower arcuate arched section. Using a tape measure, measure the length and width of the arc. Cut the corresponding piece from the GCR. Attach it to the bottom of the arch, carefully bending to give it the desired shape.
The edges of the drywall rectangle should be flush with the walls of the arch. Secure the section with self-tapping screws on both sides of the arc. Read from the center of the arch.
Inspect the resulting structure and eliminate minor defects. Proceed to the finish. Glue the edges of the GCR with a fiberglass mesh or paper tape.
Apply putty (minimum 3 layers). Sand carefully with a grater. The arch is ready. It remains only to paint it.

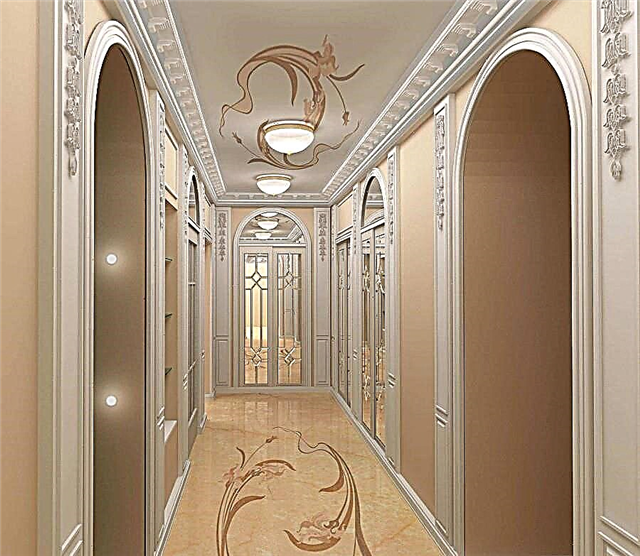
Varieties of arches
There are different types of drywall arches. They usually differ in the configuration of the top, and in some cases, in the way they are connected to vertical segments.


The photo of drywall arches shows that they are usually divided into six types:
- Classic.
- Modern.
- Romance.
- Ellipse.
- Trapezoid.
- Portal.
Separately, a semi-arch is also allocated.

It is not so difficult to make and mount an arched structure yourself. It is only necessary to study the technology and choose the appropriate arch design from drywall. We wish you success.